 Billing Bazaar
How to add business details and GSTIN in Vyapar
Your business details in Vyapar (name, GSTIN, address and contact) print on every invoice and decide how GST is calculated. This guide fills in the business profile in the Vyapar desktop app.
| Time needed | 3 minutes |
|---|---|
| Steps | 7, each with a screenshot |
| Tested on | Vyapar Desktop for Mac, October 2026 |
| Last updated | 11 October 2026 |
Before you start
- Your 15-character GSTIN, if you are GST registered.
- The full business address and pincode as you want it printed on invoices.
- Optional: your logo and a scanned signature (covered in a separate guide).
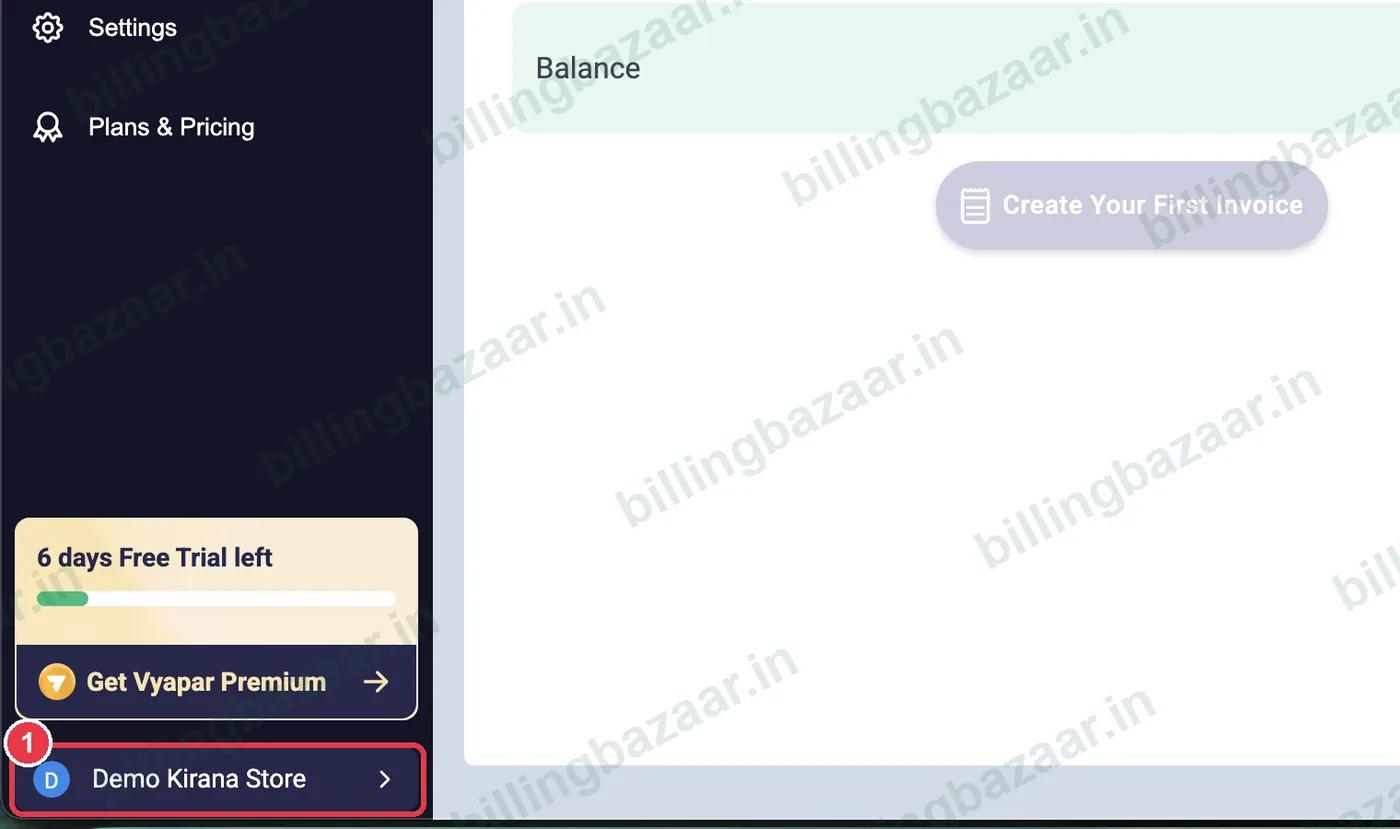
1Click your company name
At the bottom of the left sidebar, click your company name (here Demo Kirana Store). If you have an unsaved invoice open, Vyapar asks whether to discard it; click Ok.
2Check the business details
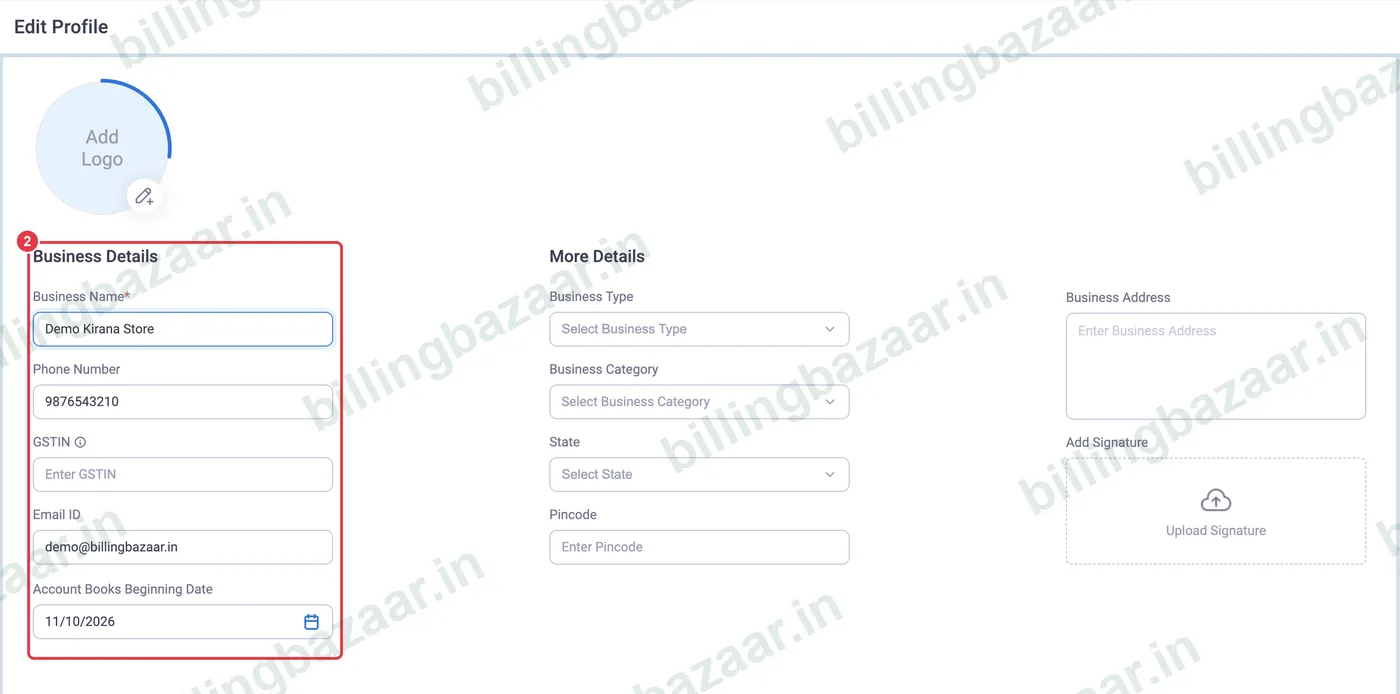
The Edit Profile screen opens. Under Business Details, check the business name, phone number and email. These print on invoices exactly as typed. Account Books Beginning Date is the date your records in Vyapar start from.
3Enter your GSTIN
Type your 15-character GSTIN. Vyapar checks it online and fills in the State automatically from the first two digits (27 is Maharashtra). If it shows We could not verify GSTIN, re-check the number; Vyapar still lets you save it.
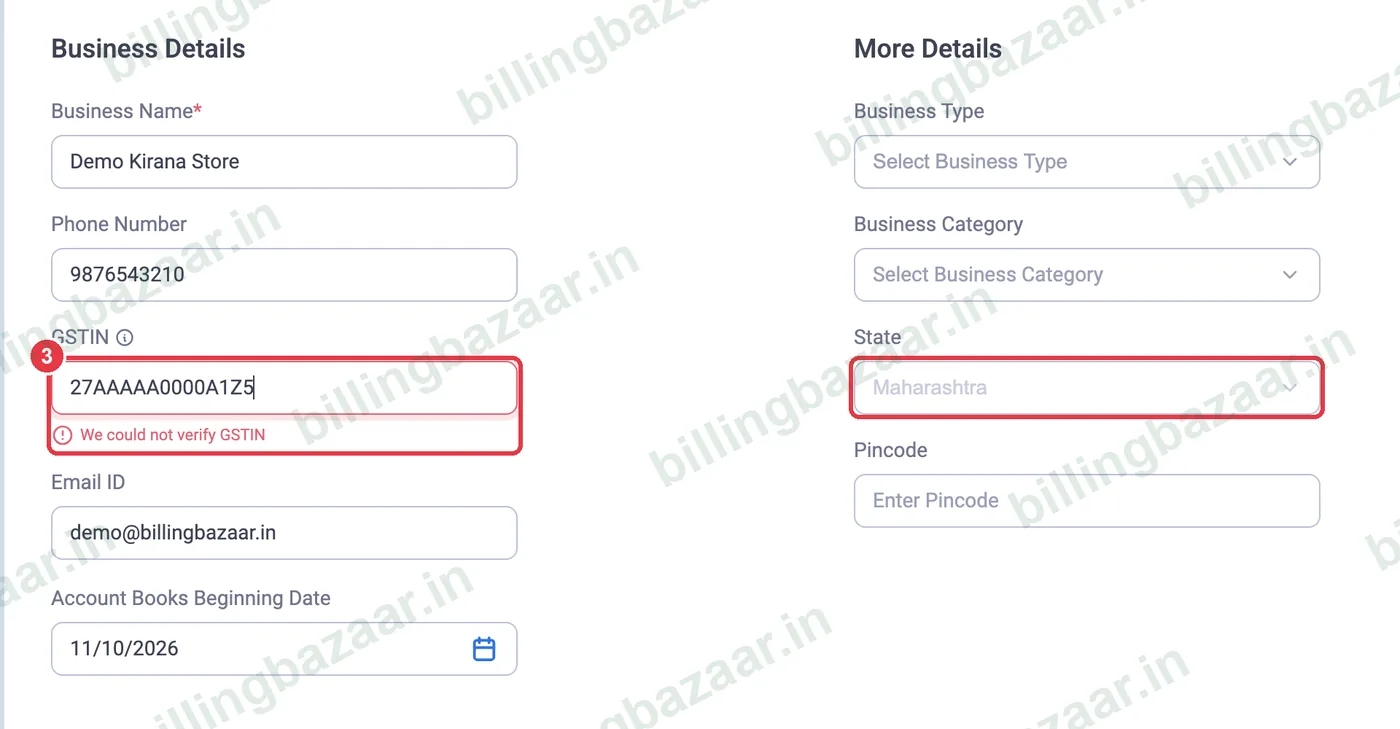
Tip: The state decides whether a sale is charged CGST + SGST (same state) or IGST (other state), so make sure it is right.
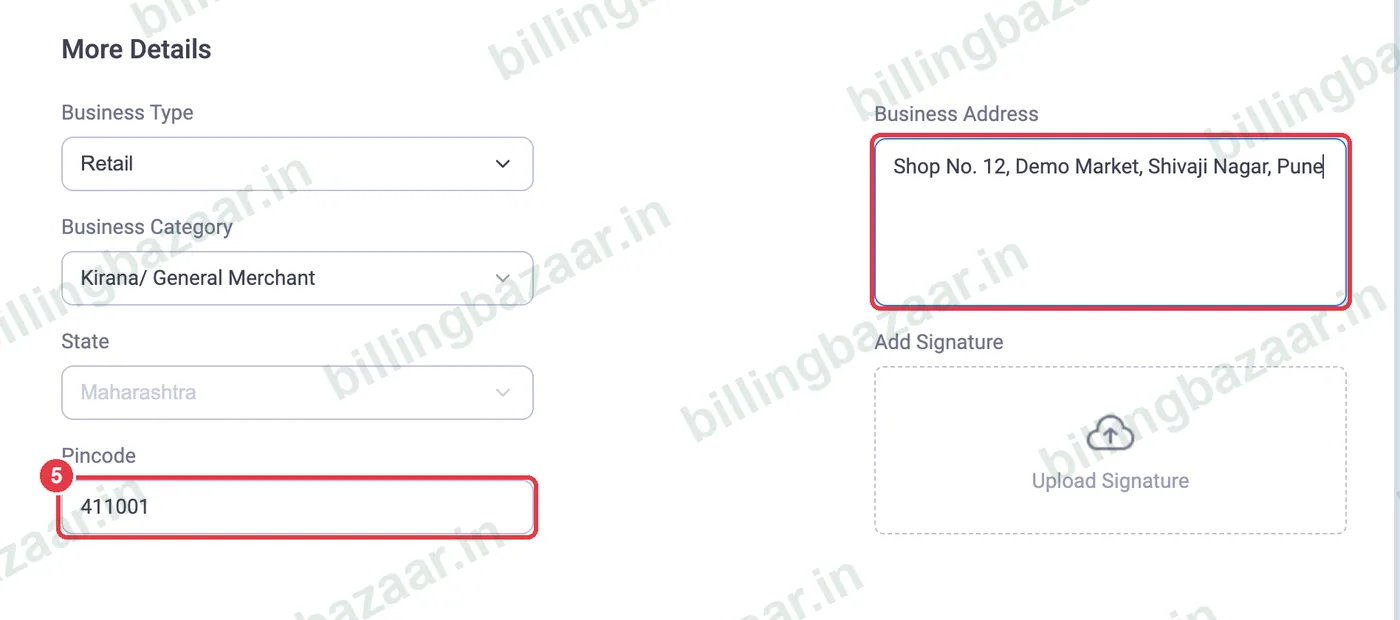
4Choose business type and category
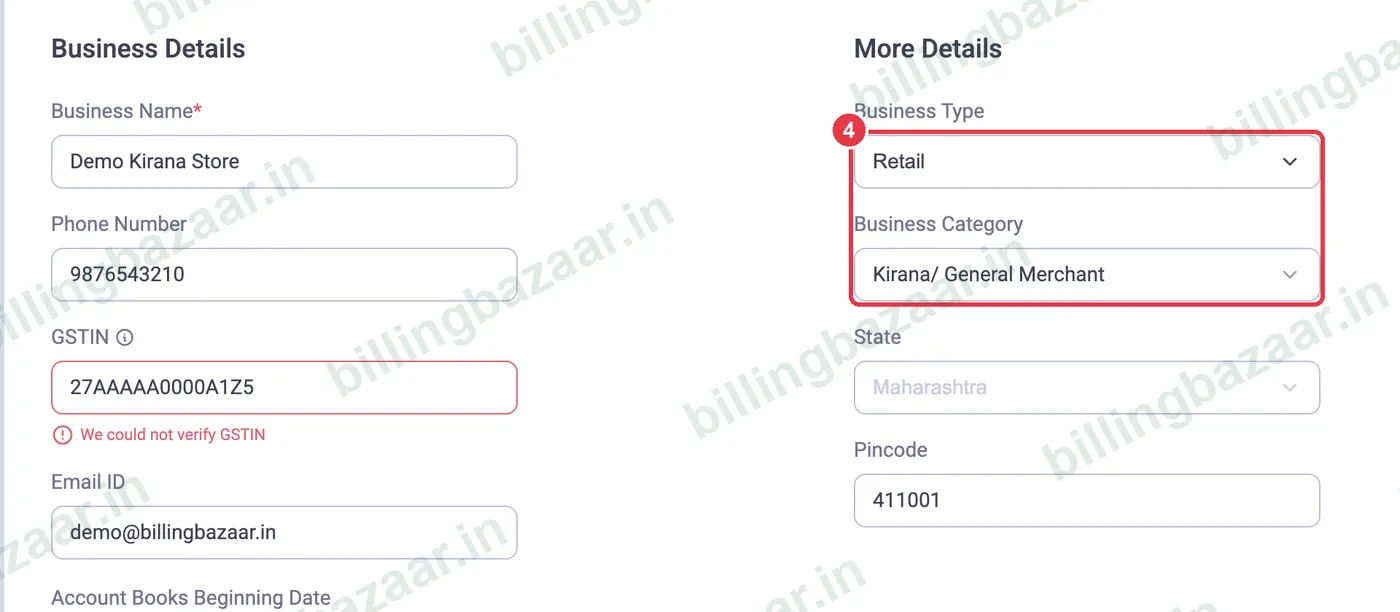
Under More Details, pick the Business Type (Retail, Wholesale, Distributor, Service, Manufacturing or Others). Then search the Business Category list; for a grocery shop, type Kir and choose Kirana/ General Merchant.
5Add pincode and business address
Enter the Pincode and the full Business Address. The address prints under your business name on invoices, so include the shop number, area and city.
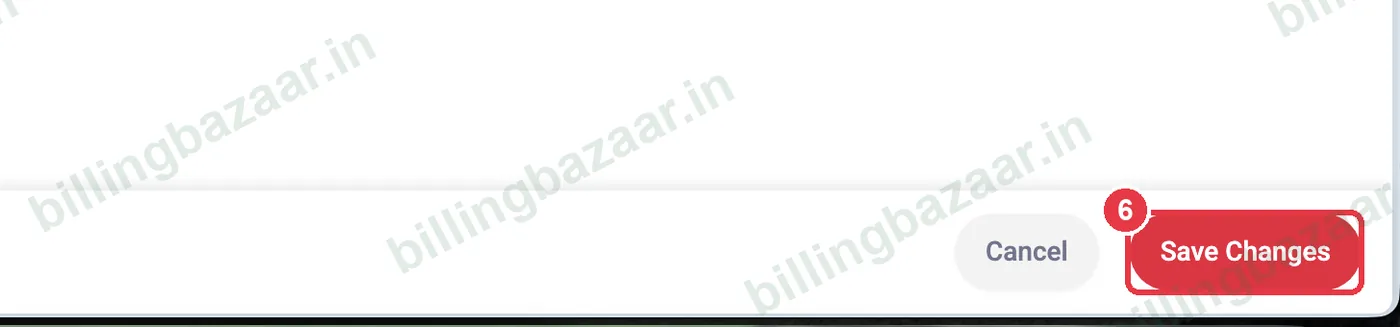
6Click Save Changes
Click the red Save Changes button at the bottom right.
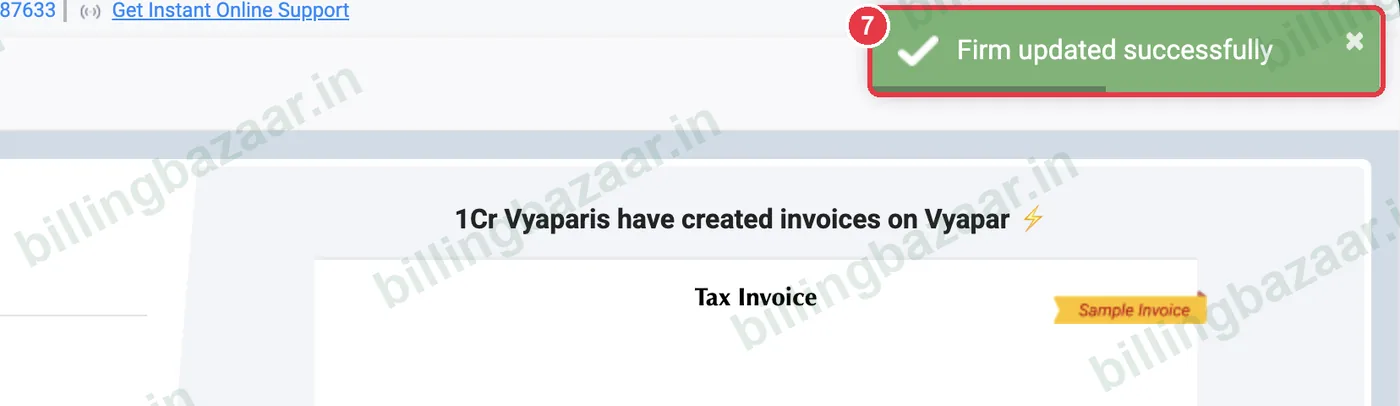
7Check the confirmation
Vyapar shows Firm updated successfully at the top right. Your new details now appear on every invoice you create.
Good to know
- A GSTIN has 15 characters: 2-digit state code, 10-character PAN, entity number, Z and a check digit.
- Leave GSTIN empty if you are not GST registered. Vyapar can then make bills of supply instead of tax invoices.
- Add your logo and signature from the same Edit Profile screen.
- Changes apply to new invoices; check one old invoice if you need to reprint it.
Questions people ask
Where do I add GSTIN in Vyapar?
Click your company name at the bottom of the left sidebar to open Edit Profile, then type the GSTIN in the GSTIN field under Business Details and click Save Changes.
Why does Vyapar say it could not verify my GSTIN?
Vyapar checks the GSTIN online. The message appears if the number has a typo, is not active yet, or the check could not connect. Re-check the number; Vyapar still saves it.
How does Vyapar know my state?
It reads the first two digits of the GSTIN, which are the state code (for example 27 for Maharashtra), and fills in the state automatically.
Can I change business details later?
Yes. Open Edit Profile again from the company name, change any field and click Save Changes.
Does the business address print on invoices?
Yes. The name, address, phone, email and GSTIN from this screen appear at the top of your invoices.
Related guides
- How to create multiple companies in Vyapar
- How to add your business logo and signature in Vyapar
- How to create a GST invoice in Vyapar
Screenshots are from a demo company in Vyapar Desktop for Mac, October 2026. Menus can move slightly between app versions. Guide by Billing Bazaar, a Vyapar partner.