 Billing Bazaar
How to create item categories in Vyapar
Categories make a long item list easy to search and let you filter stock and sales reports by group. Create a category once and move items into it in bulk.
| Time needed | 1 minute |
|---|---|
| Steps | 5, each with a screenshot |
| Tested on | Vyapar Desktop for Mac, October 2026 |
| Last updated | 11 October 2026 |
Before you start
- A list of the groups you want, such as Grocery, Medicines, Personal Care.
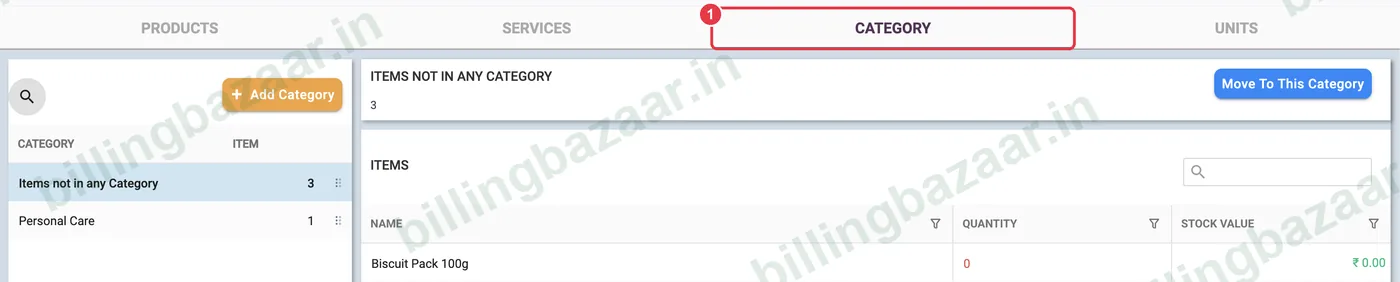
1Open Items > Category
Open Items and click the CATEGORY tab. It lists every category with its item count, plus Items not in any Category.
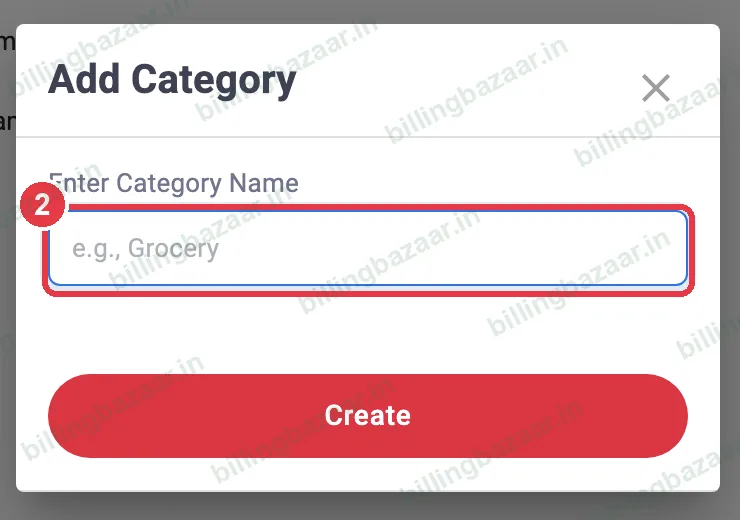
2Add a category
Click Add Category, type the name (for example Medicines) and click Create.
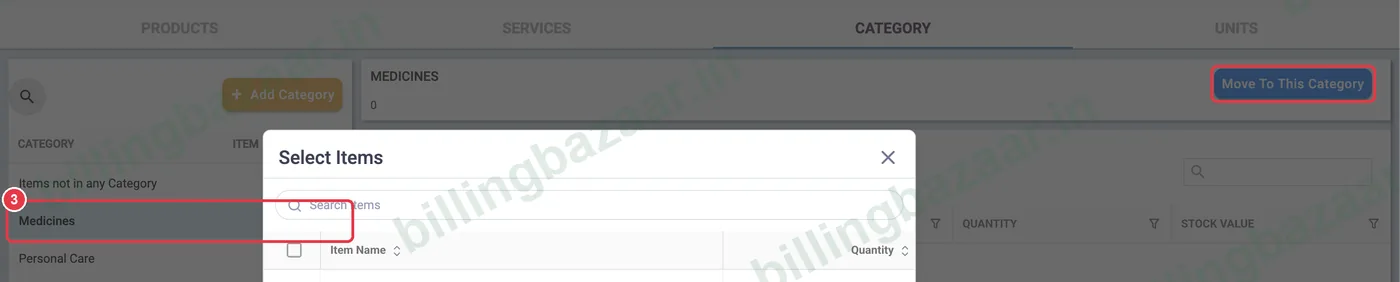
3Select it and click Move To This Category
Click the new category in the list, then Move To This Category at the top right.
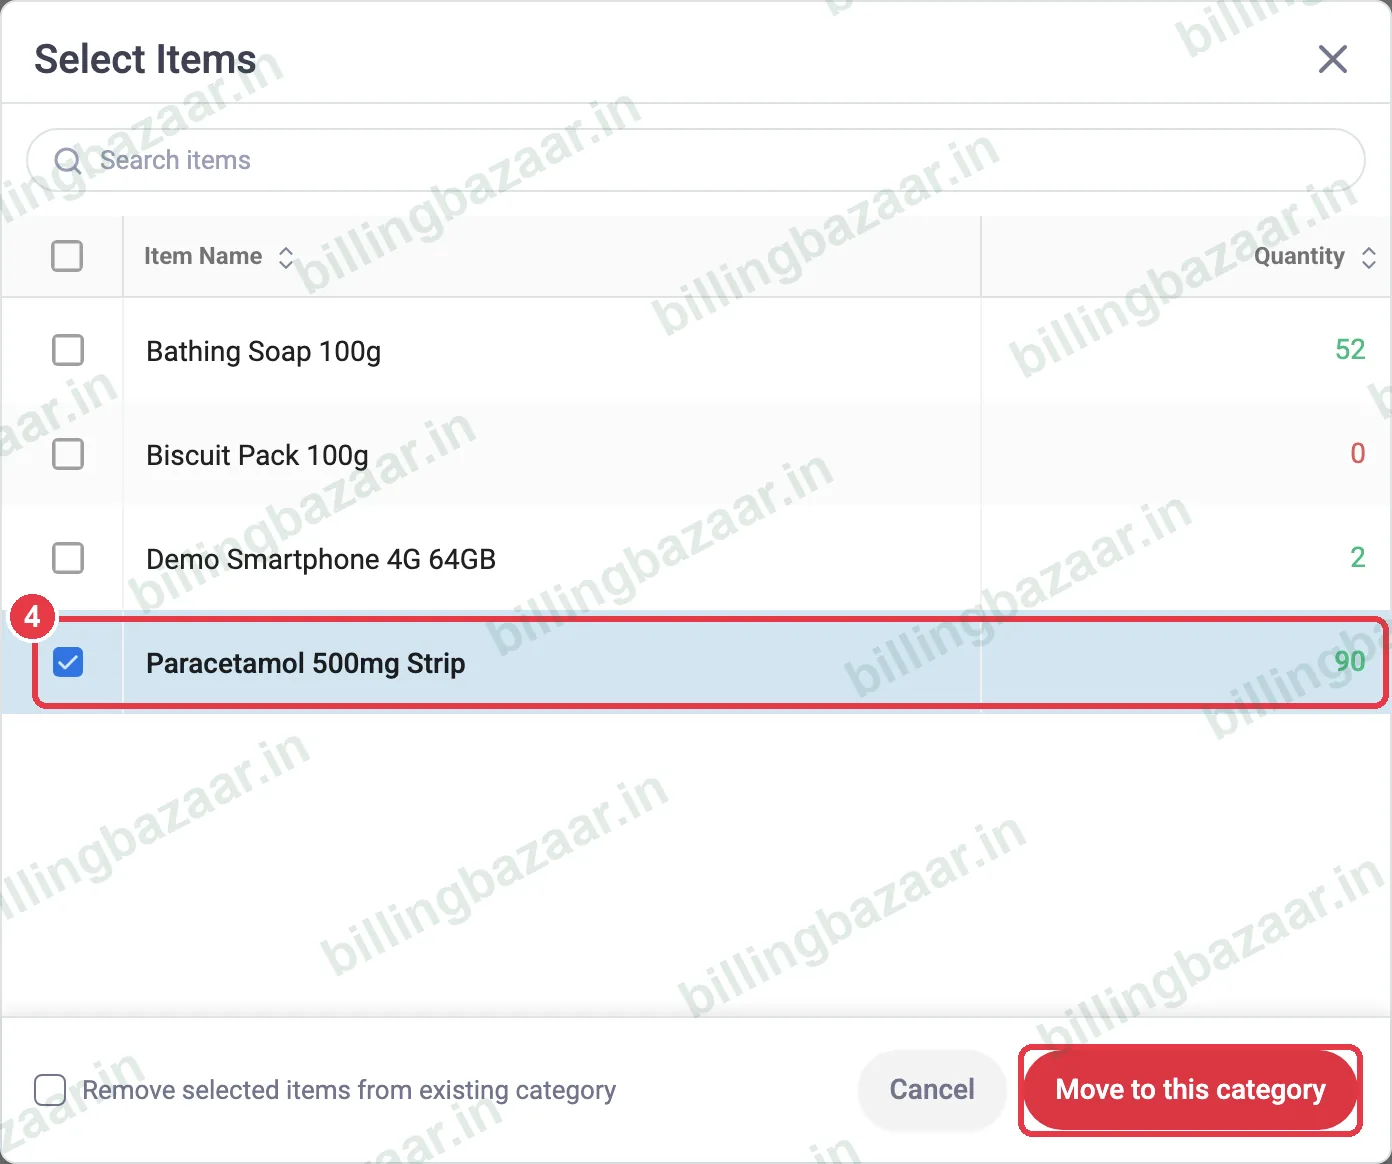
4Tick the items and move
In Select Items, tick the items that belong in this category (use the search box for long lists) and click Move to this category.
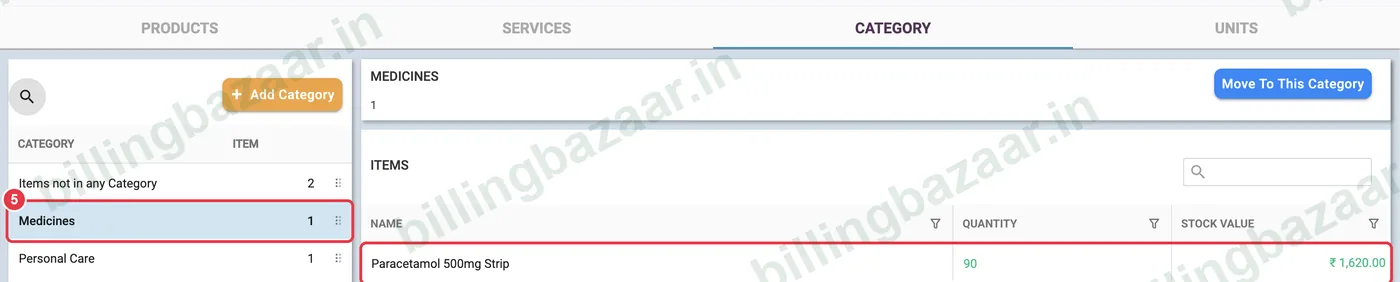
5Check the category
The category now shows its items with quantity and stock value.
Good to know
- You can also pick a category while adding an item.
- Tick Remove selected items from existing category when moving items between categories.
- Filter the stock summary by category to count one section at a time.
Questions people ask
How do I create a category in Vyapar?
Items > Category > Add Category, type the name and click Create.
How do I move items into a category?
Select the category, click Move To This Category, tick the items and click Move to this category.
Can an item be in two categories?
Items normally sit in one category; tick Remove selected items from existing category to move them cleanly.
Related guides
- How to add items with HSN code and GST rate in Vyapar
- How to see the stock summary report in Vyapar
- How to import items from Excel in Vyapar
Screenshots are from a demo company in Vyapar Desktop for Mac, October 2026. Menus can move slightly between app versions. Guide by Billing Bazaar, a Vyapar partner.