 Billing Bazaar
How to create party groups in Vyapar
Party groups let you organise customers by type or area, such as wholesale buyers, retail customers or suppliers, and see what each group owes in total.
| Time needed | 2 minutes |
|---|---|
| Steps | 5, each with a screenshot |
| Tested on | Vyapar Desktop for Mac, October 2026 |
| Last updated | 11 October 2026 |
Before you start
- Some parties already added.
1Turn on Party Grouping
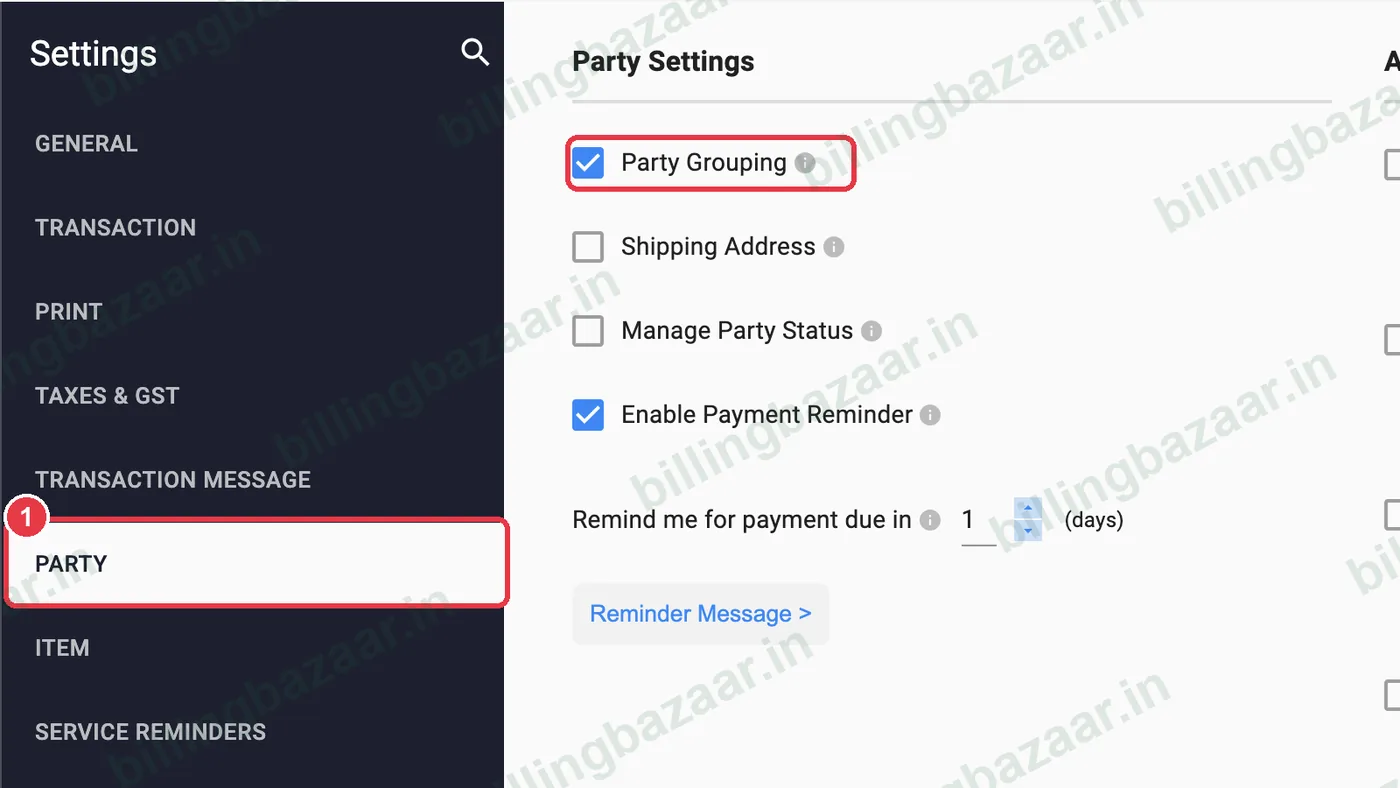
Open Settings > PARTY and tick Party Grouping.
2Switch to Groups
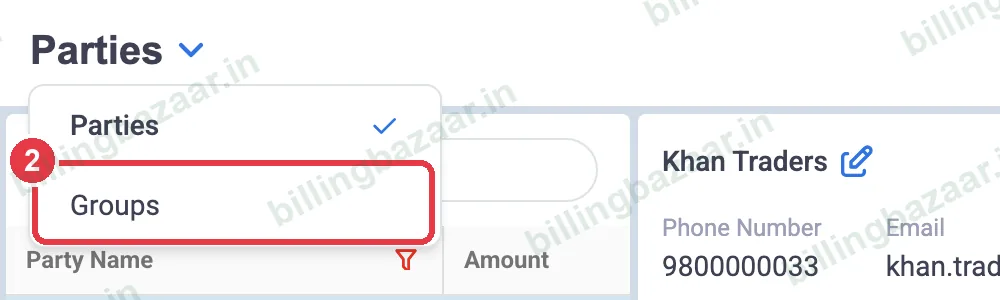
Go to Parties > Party Details, click the arrow next to the Parties title and choose Groups. All parties start in the General group.
3Add a group
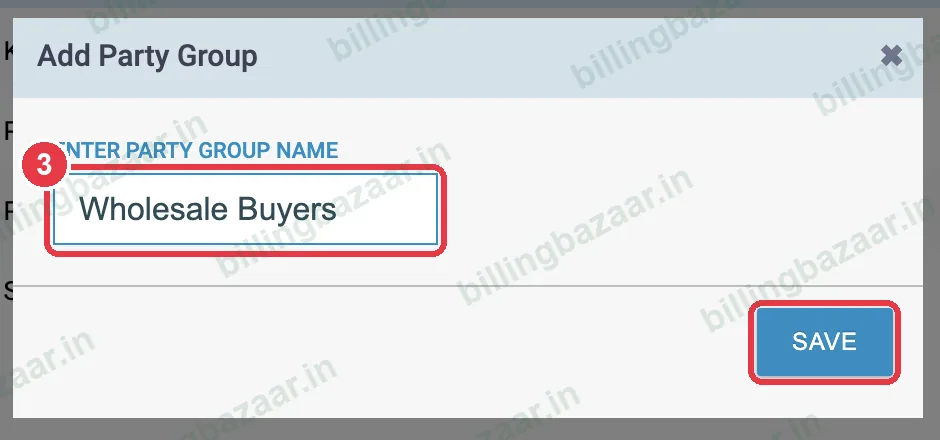
Click + Add Party Group, type a name such as Wholesale Buyers and click SAVE.
4Move parties into the group
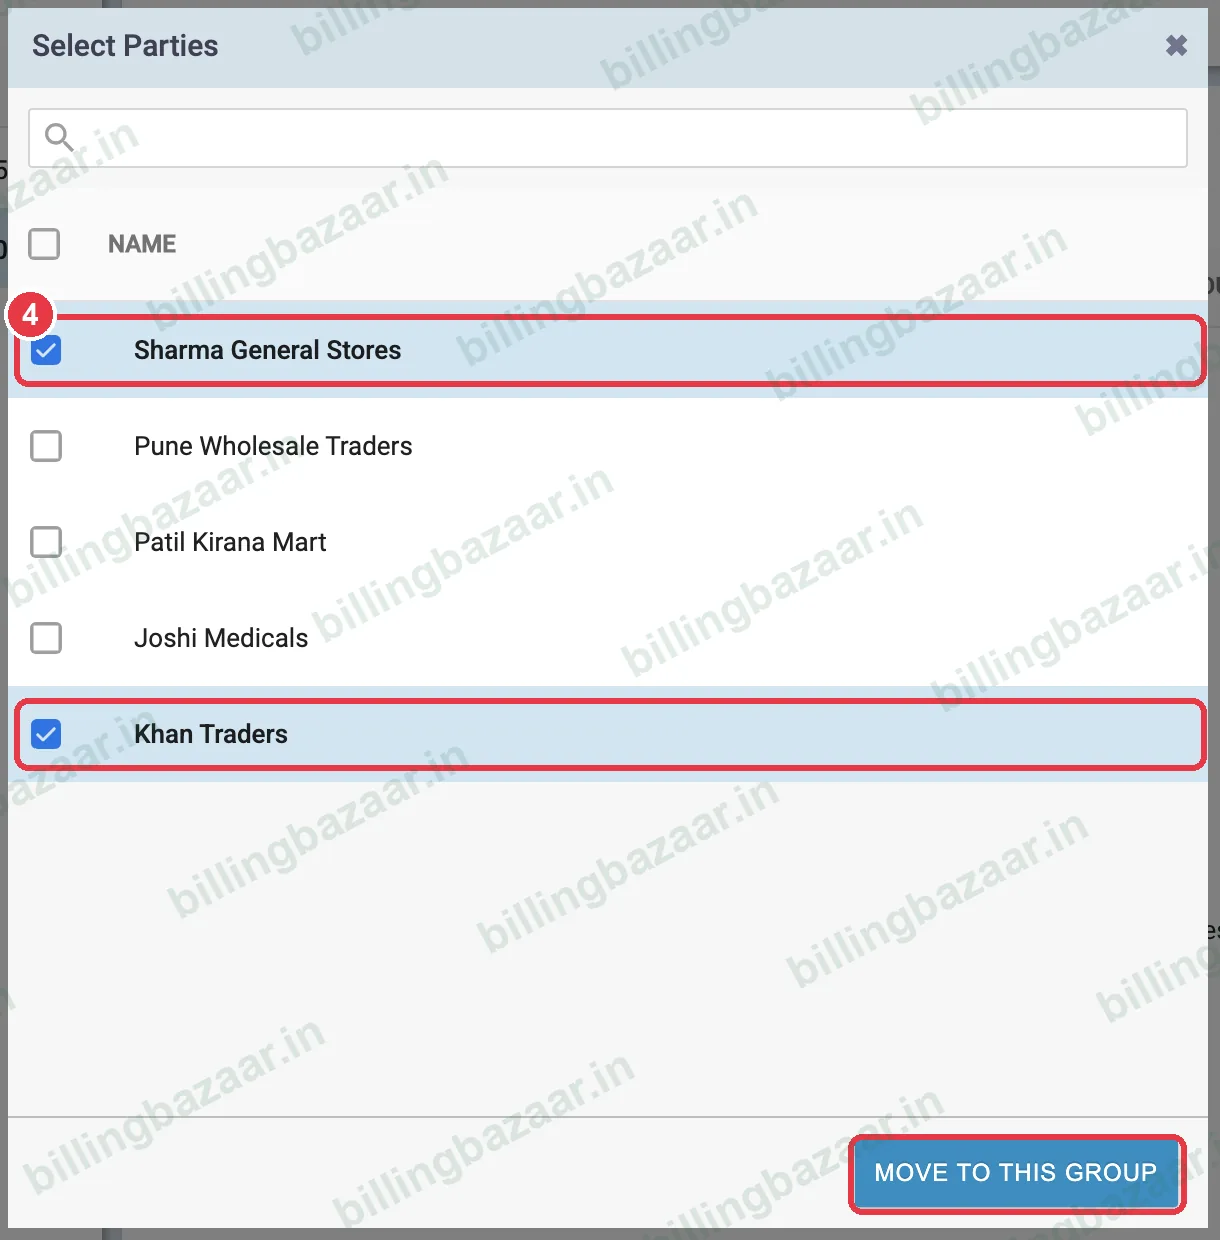
Select the new group, click Move To This Group, tick the parties that belong to it and click MOVE TO THIS GROUP.
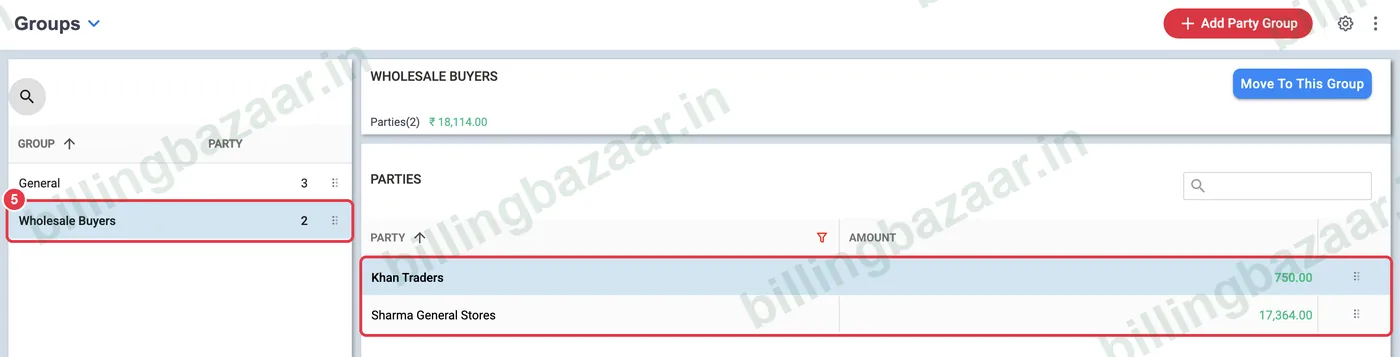
5Check the group
The group now lists its parties with each balance, and the header shows the number of parties and the group's total.
Good to know
- Use groups for routes (Area 1, Area 2) when collecting payments.
- You can also choose a group while adding a party.
- Groups do not change prices; use party-wise rates for that.
Questions people ask
How do I group customers in Vyapar?
Turn on Party Grouping in Settings > Party, then go to Parties > Groups, add a group and move parties into it.
Can I see the total balance of a group?
Yes. Each group shows the number of parties and the total amount.
What is the General group?
The default group that every party is in until you move it.
Related guides
- How to add customers and suppliers in Vyapar
- How to see and share a party statement (ledger) in Vyapar
- How to send payment reminders in Vyapar
Screenshots are from a demo company in Vyapar Desktop for Mac, October 2026. Menus can move slightly between app versions. Guide by Billing Bazaar, a Vyapar partner.