 Billing Bazaar
How to turn on GST and set tax rates in Vyapar
Vyapar's GST settings decide what appears on invoices: GST columns, HSN/SAC codes and place of supply. They are on by default for Indian GST-registered businesses, but it is worth checking them once, especially if you are on the composition scheme.
| Time needed | 1 minute |
|---|---|
| Steps | 4, each with a screenshot |
| Tested on | Vyapar Desktop for Mac, October 2026 |
| Last updated | 11 October 2026 |
Before you start
- Your GSTIN added in the business profile.
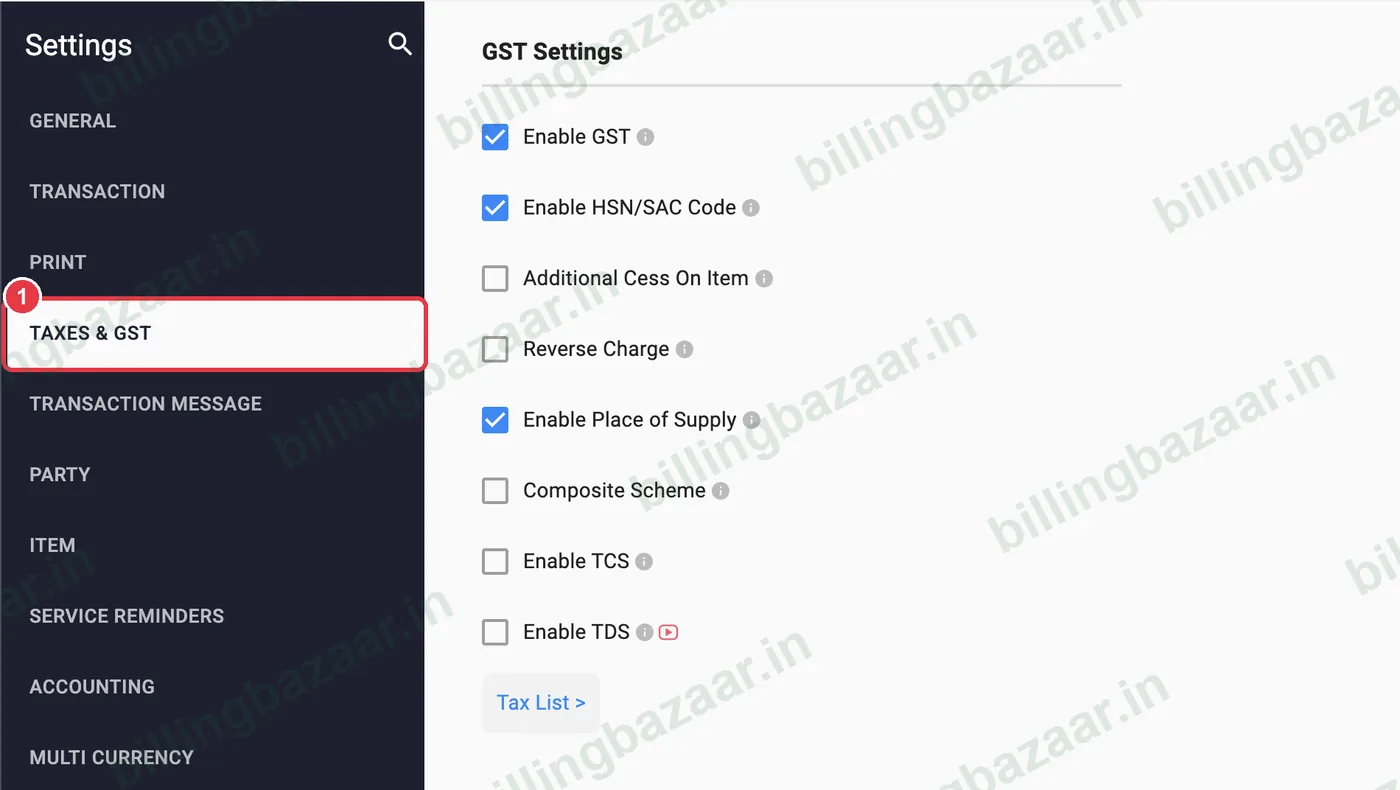
1Open Settings > Taxes & GST
Click Settings and choose TAXES & GST.
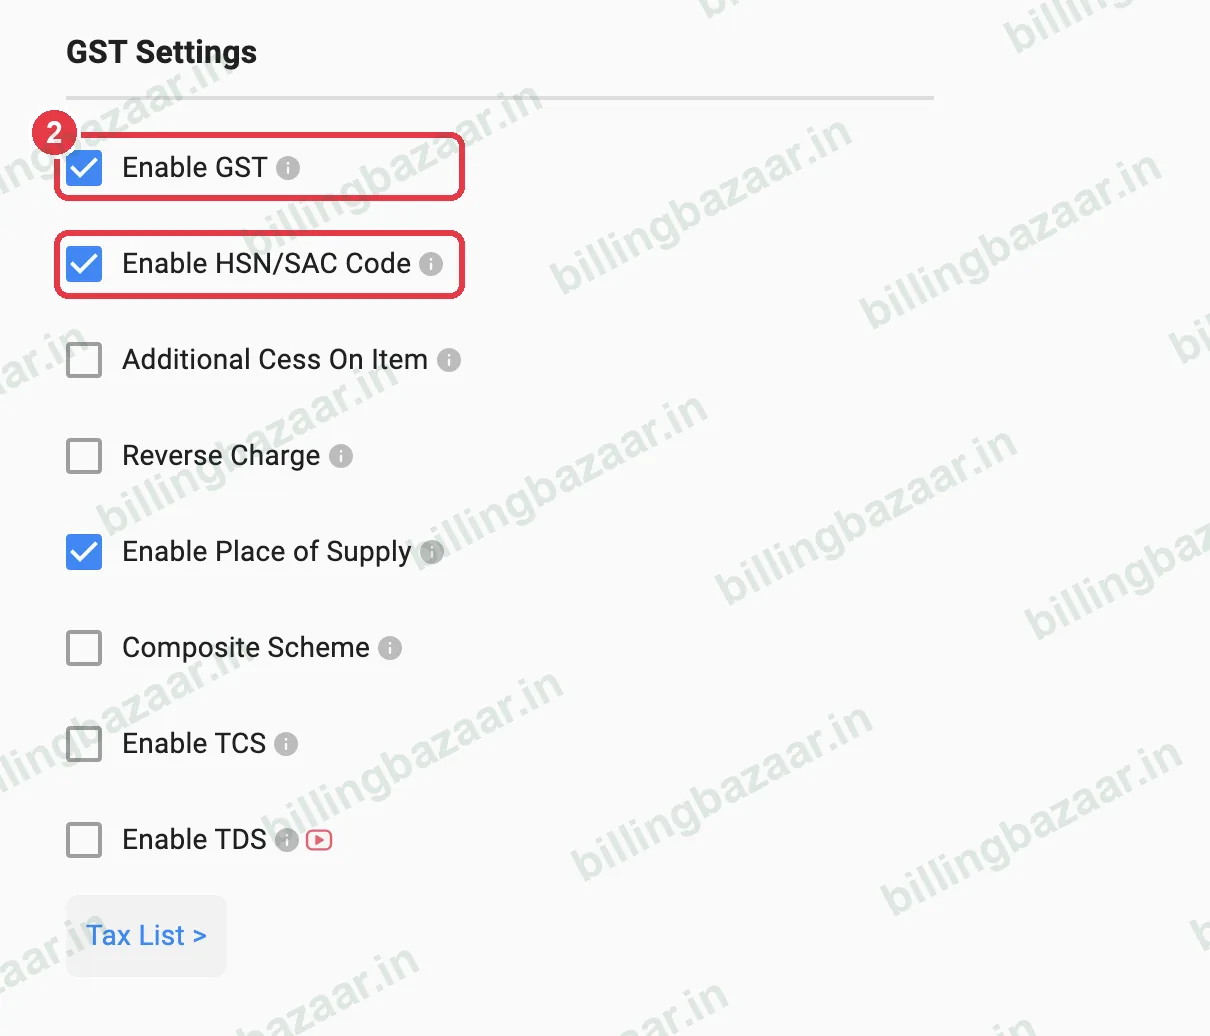
2Enable GST and HSN/SAC
Tick Enable GST and Enable HSN/SAC Code. Invoices then show tax columns and the HSN or SAC code of each item.
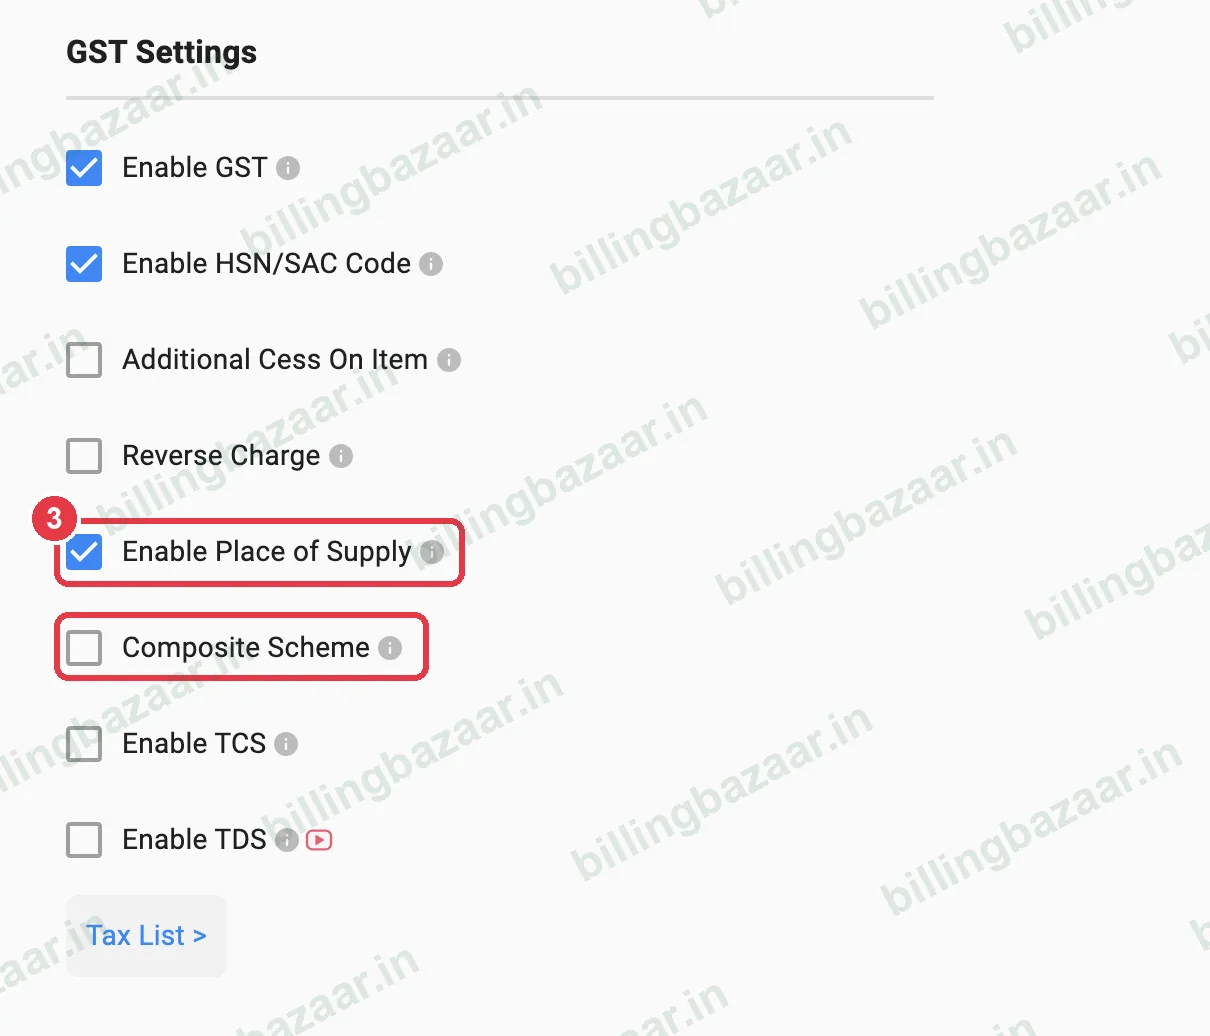
3Check place of supply and composition
Keep Enable Place of Supply on so Vyapar charges CGST+SGST or IGST correctly. Tick Composite Scheme only if you are registered under the composition scheme; Vyapar then issues bills of supply.
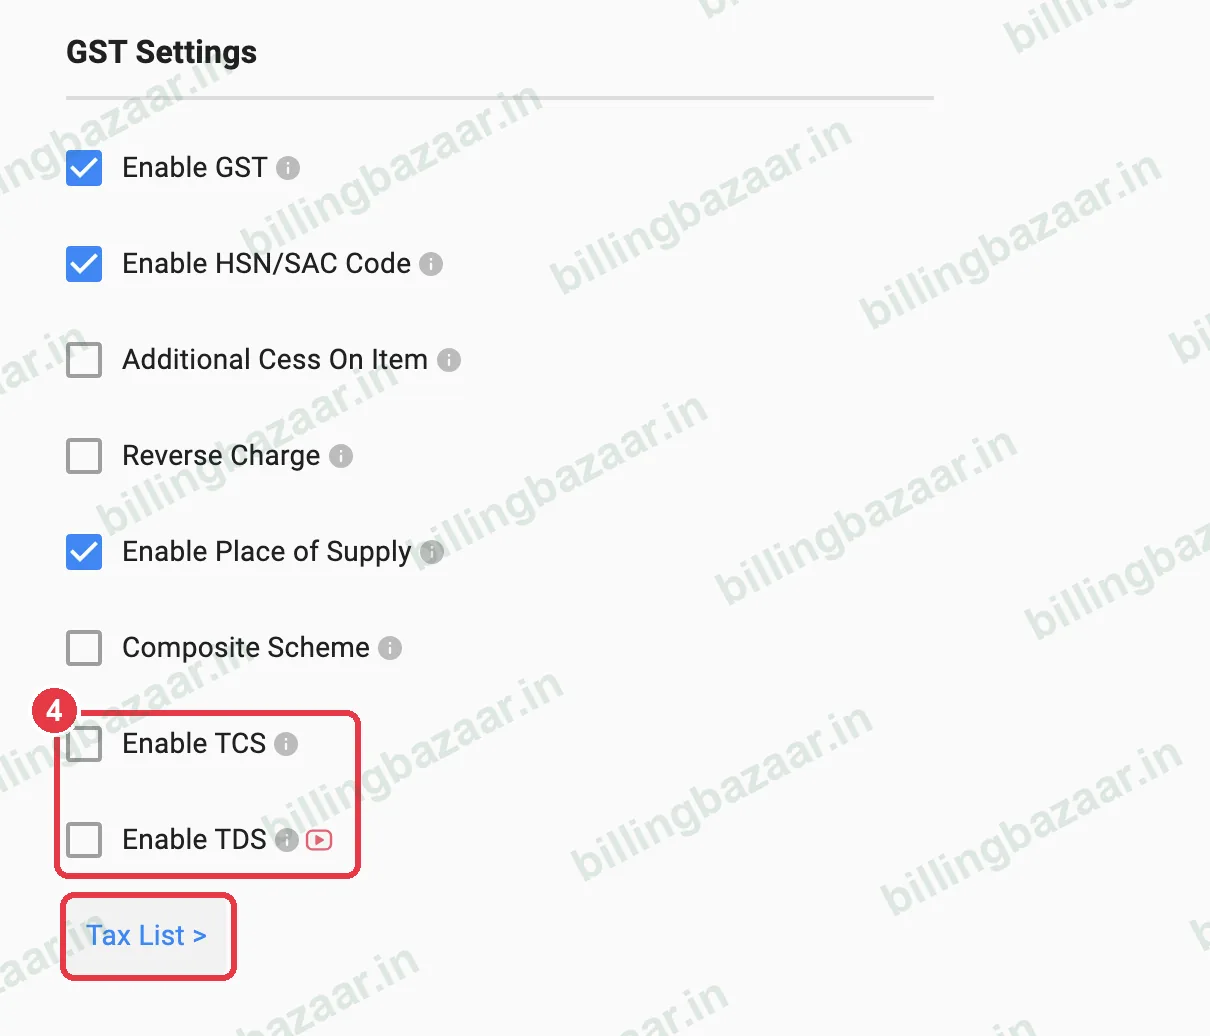
4Optional: cess, reverse charge, TCS, TDS and tax list
Turn on Additional Cess On Item, Reverse Charge, Enable TCS or Enable TDS only if they apply to you. Tax List shows all rates and lets you add custom ones.
Good to know
- Changes apply to new transactions.
- Ask your CA before turning on reverse charge, TCS or TDS.
- Set each item's GST rate on the item itself.
Questions people ask
How do I enable GST in Vyapar?
Settings > Taxes & GST > tick Enable GST.
Where do I set composition scheme in Vyapar?
Settings > Taxes & GST > tick Composite Scheme.
How do I add a new tax rate?
Settings > Taxes & GST > Tax List, then add the rate.
Related guides
- How to add business details and GSTIN in Vyapar
- How to add items with HSN code and GST rate in Vyapar
- How to generate the GSTR-1 report in Vyapar
Screenshots are from a demo company in Vyapar Desktop for Mac, October 2026. Menus can move slightly between app versions. Guide by Billing Bazaar, a Vyapar partner.