 Billing Bazaar
How to sign up and make your first invoice in the Vyapar mobile app
The Vyapar app is free to download on Android. Signing up takes a mobile number and an OTP, and the app then helps you make your first invoice straight away. This guide follows a fresh install on an Android phone.
| Time needed | 3 minutes |
|---|---|
| Steps | 9, each with a screenshot |
| Tested on | Vyapar Android app 29.4, October 2026 |
| Last updated | 11 October 2026 |
Before you start
- The Vyapar app installed from the Google Play Store (search "Vyapar").
- A mobile number that can receive an SMS (use a WhatsApp number, the app asks for it).
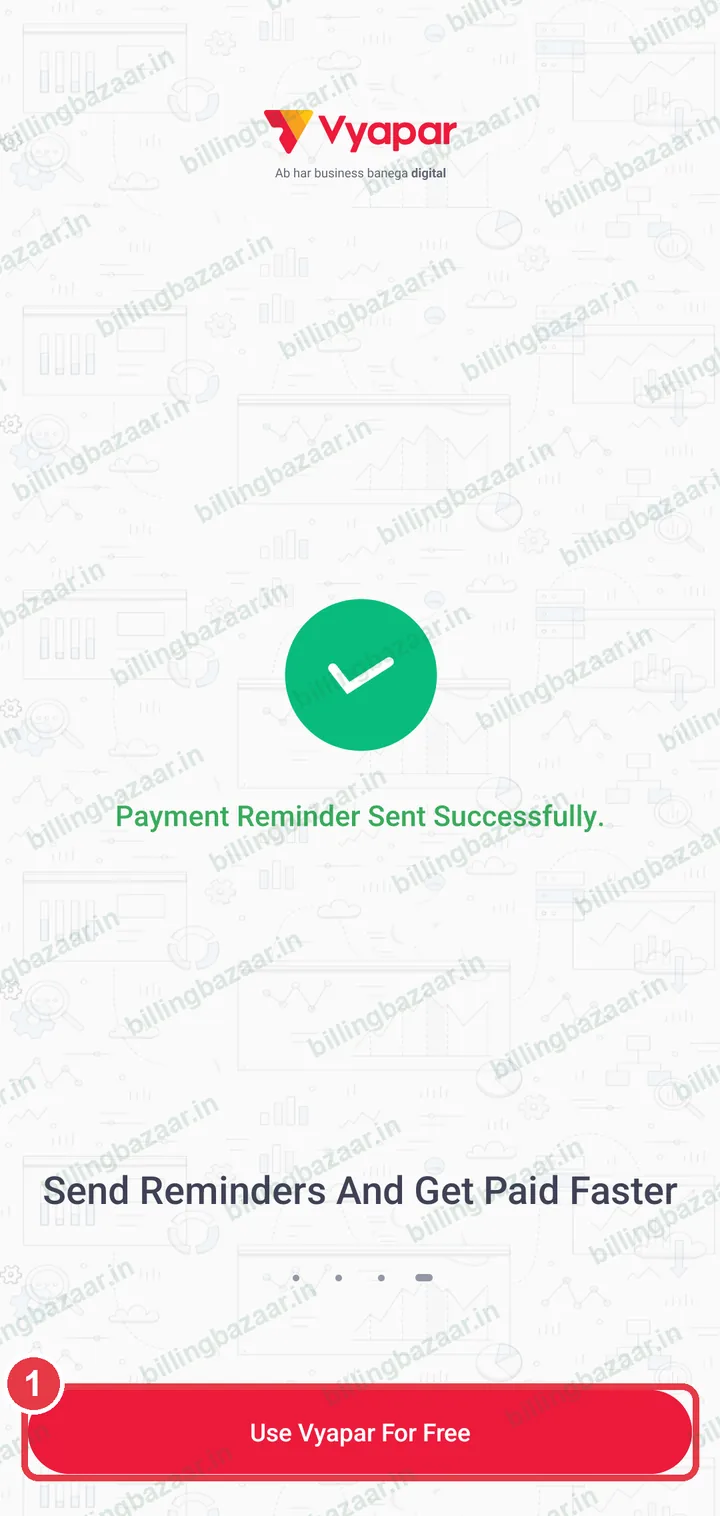
1Tap Use Vyapar For Free
Open the app. After the welcome slides, tap Use Vyapar For Free.
2Check the country and enter your number
Make sure the country shows INDIA with +91. If it shows another country, tap it and search for India. Then type your 10-digit mobile number.
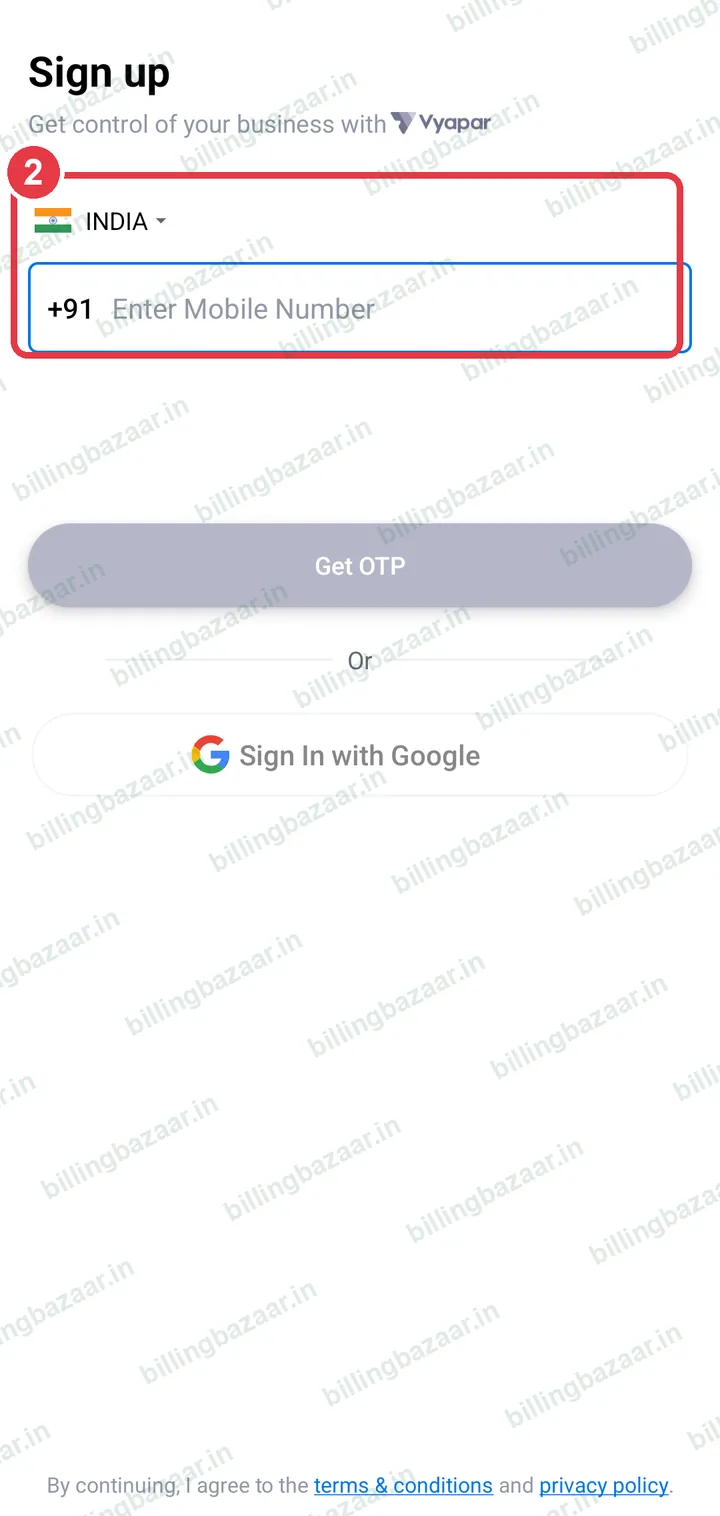
Tip: If Android offers a phone number from your SIM, you can pick it or tap the cross to type one.
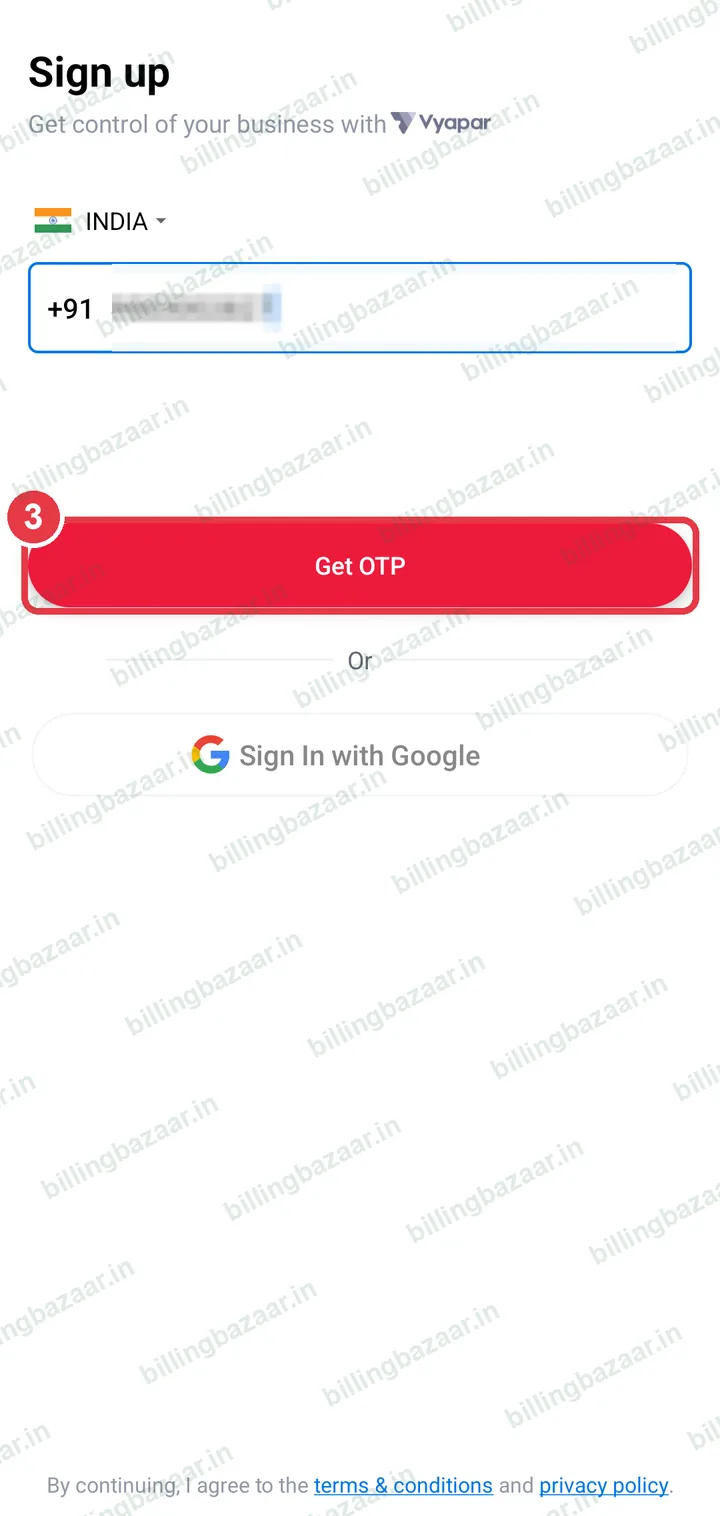
3Tap Get OTP
Tap Get OTP. You can also use Sign In with Google instead of a number.
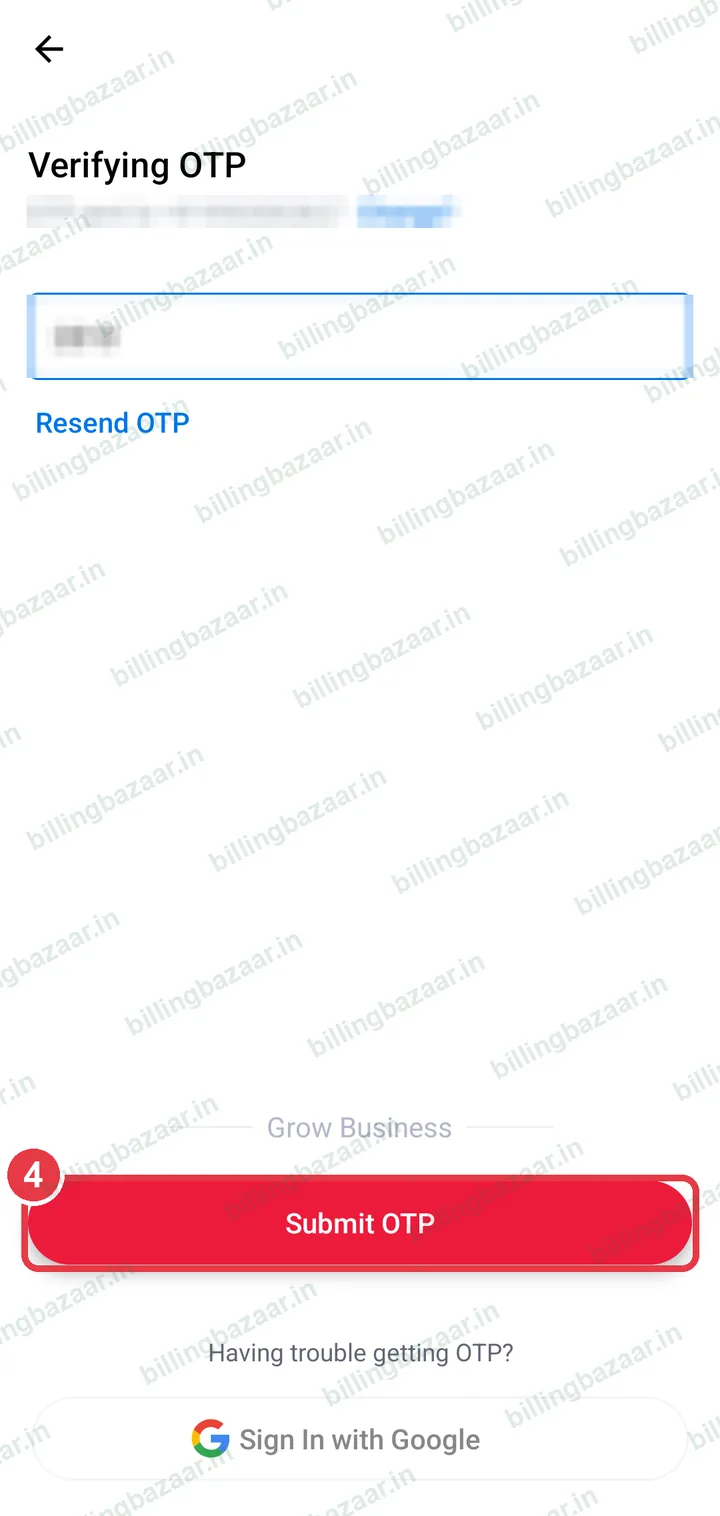
4Enter the OTP and tap Submit OTP
Type the OTP from the SMS and tap Submit OTP. Use Resend OTP if it does not arrive.
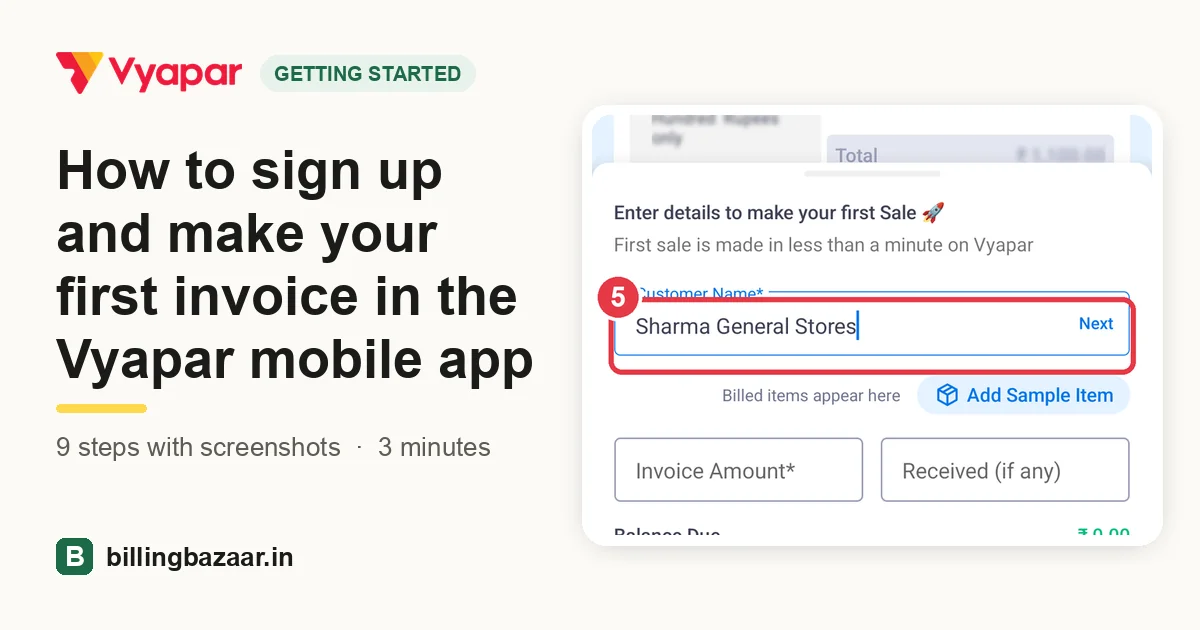
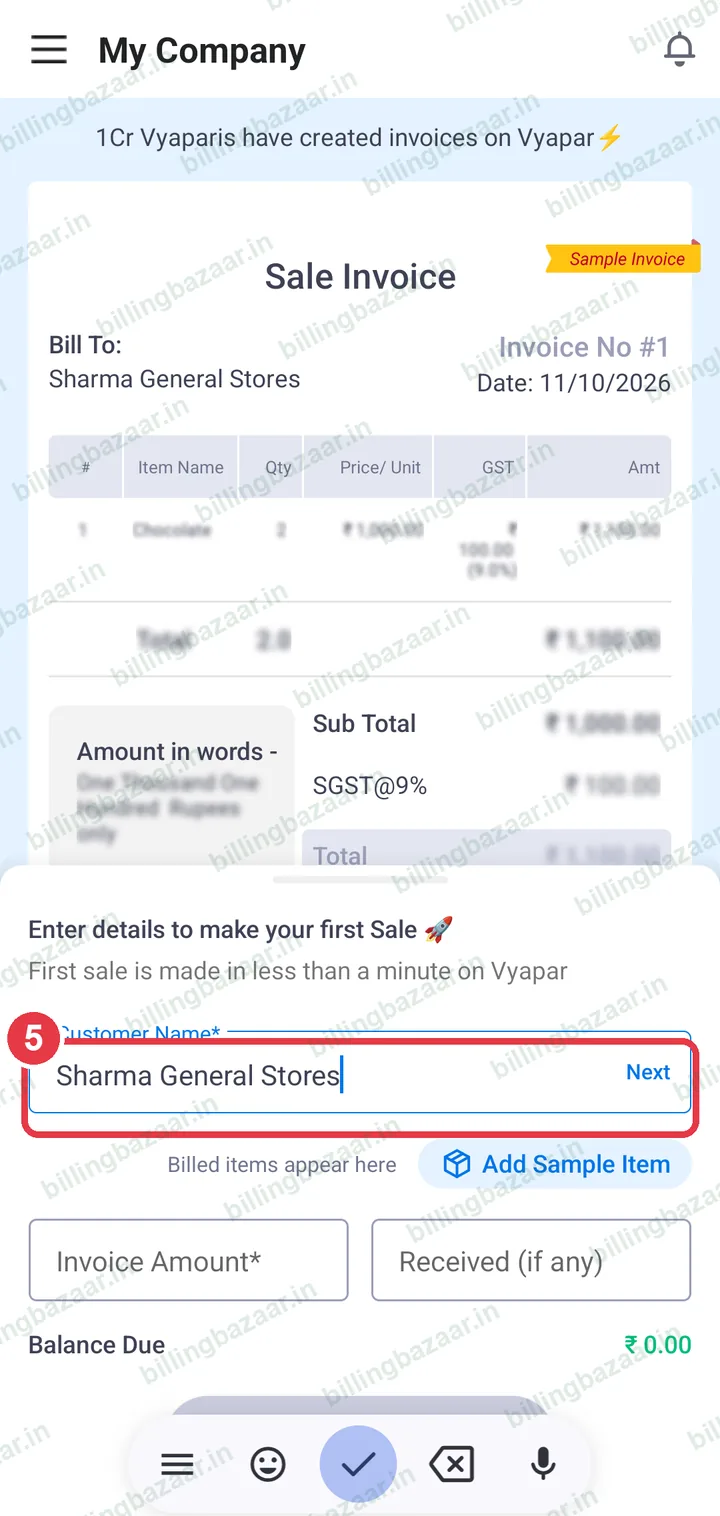
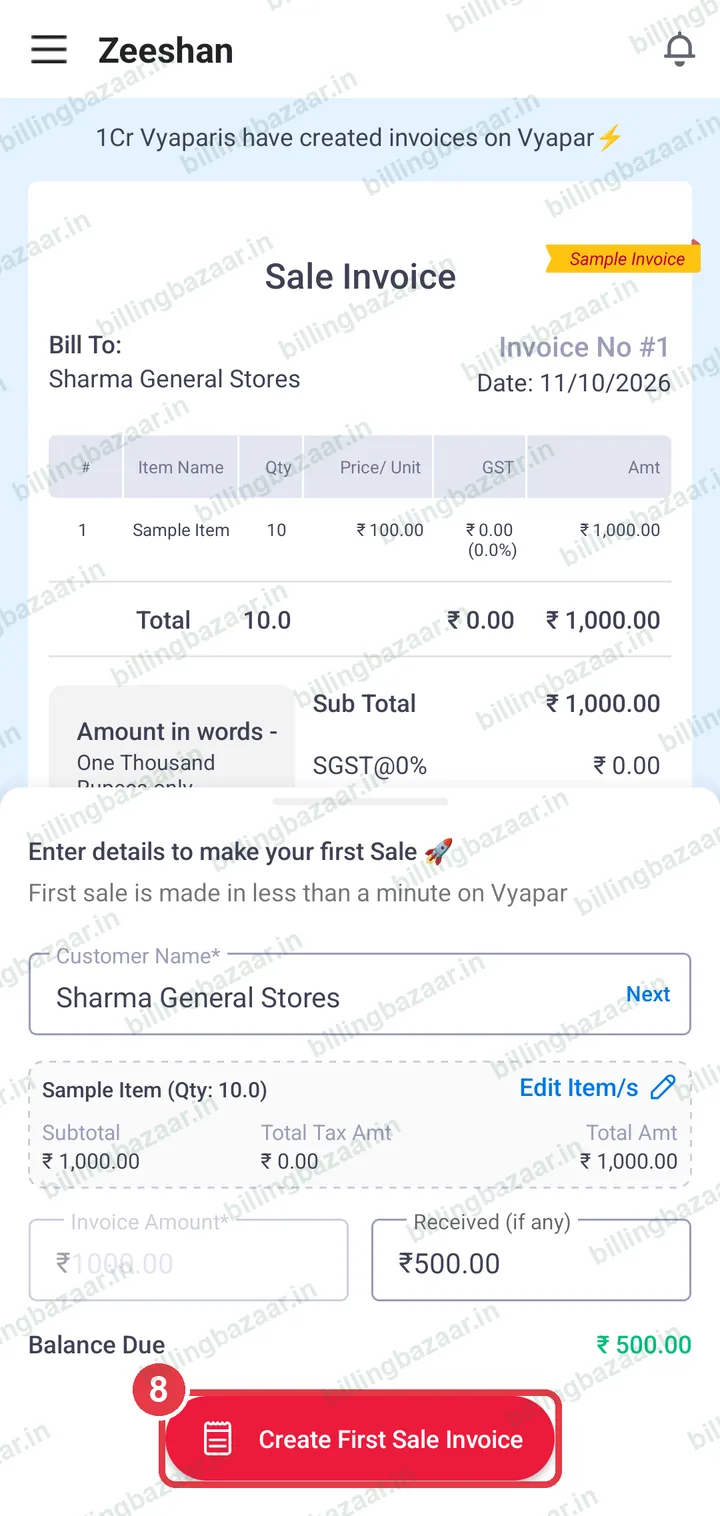
5Enter a customer name
The app opens a quick first sale. Type a customer name in Customer Name.
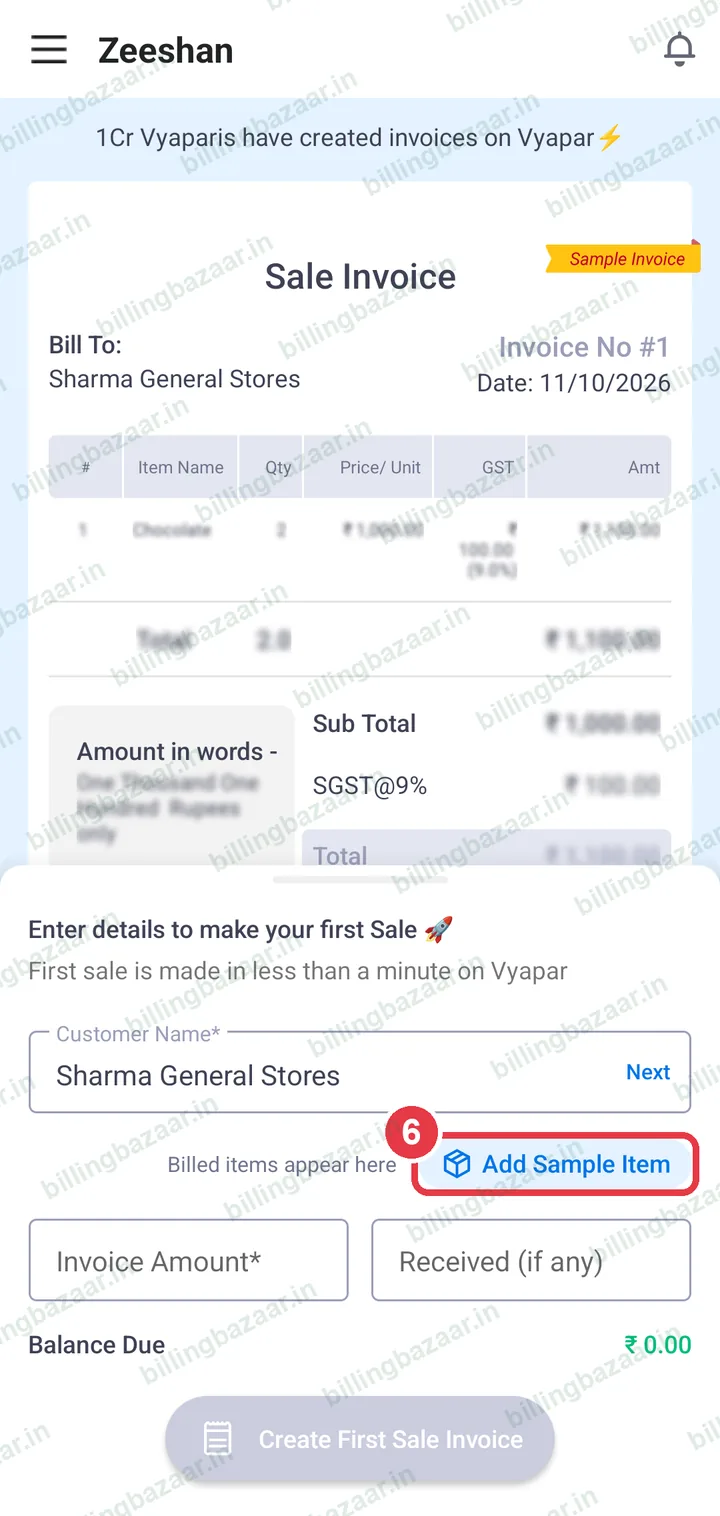
6Add an item
Tap Add Sample Item to try it with a sample, or add your own item later from the Items tab.
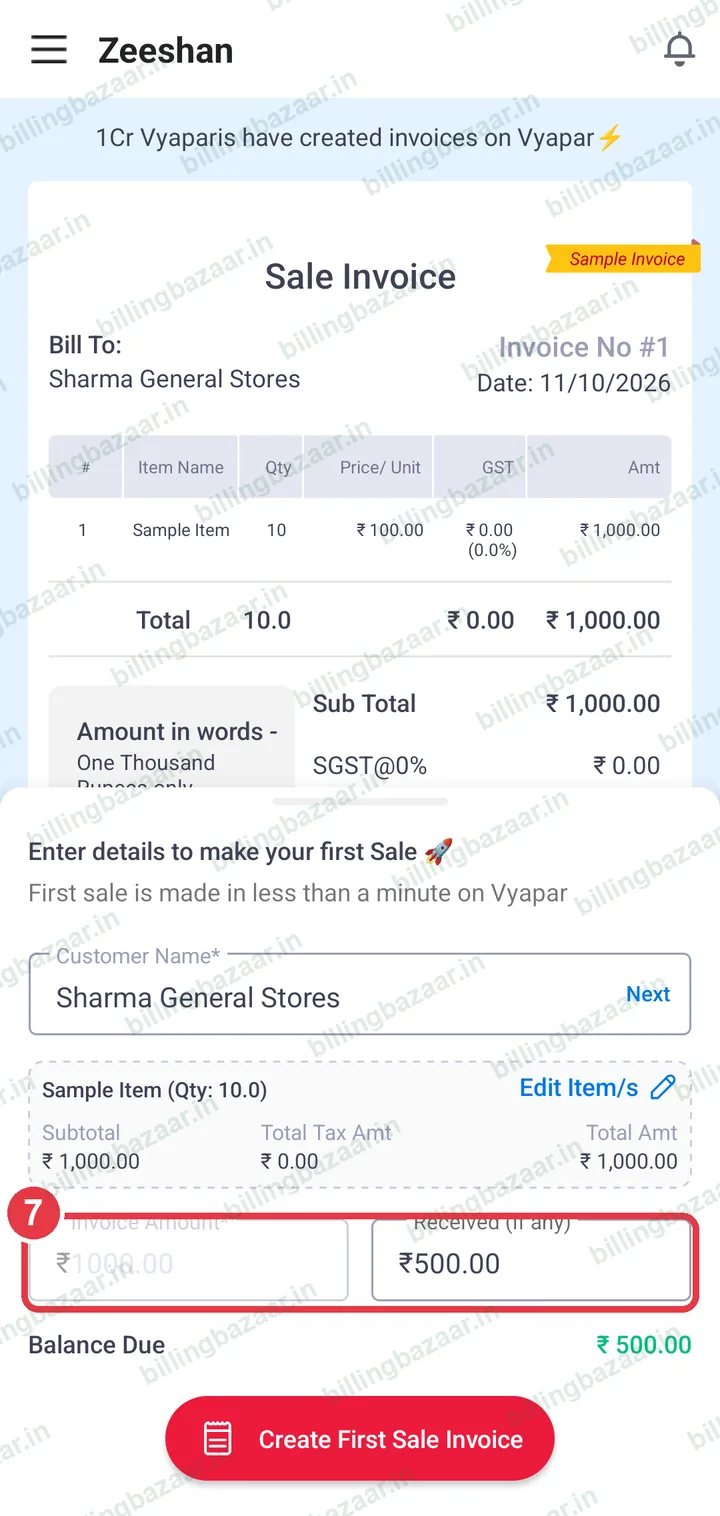
7Check the amount received
Invoice Amount fills in from the items. Enter what the customer paid in Received; the rest shows as Balance Due.
8Tap Create First Sale Invoice
Tap Create First Sale Invoice. Close any offer pop-up that appears.
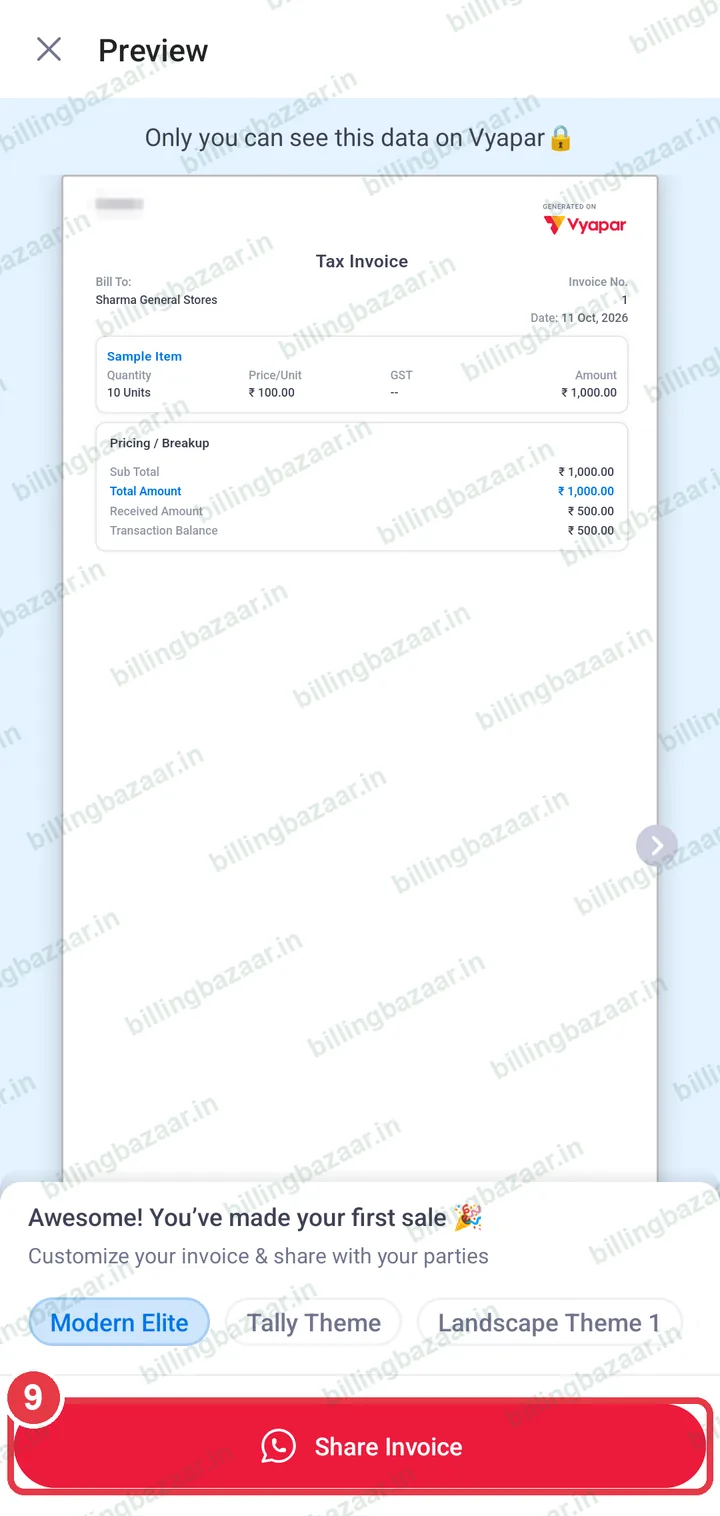
9Share the invoice
The invoice preview opens. Pick a theme if you like and tap Share Invoice to send it on WhatsApp, SMS or any app.
Good to know
- Add your business name, GSTIN and address next (see the business details guide) so they print on every invoice.
- Once the business is set up, make full GST invoices from Add New Sale on the home screen.
Questions people ask
Is the Vyapar mobile app free?
Yes, you can download it and make invoices for free. Paid plans add features such as data sync across devices, more companies and unlimited e-way bills.
Can I sign up with Google instead of a mobile number?
Yes. Tap Sign In with Google on the sign up screen and choose your Google account.
Why does the app show United States instead of India?
The app reads the phone's region. Tap the country on the sign up screen and choose India; for a new business the app also asks for the country once, and it cannot be changed later.
Where do I enter a Vyapar referral code?
Referral benefits apply only to new sign-ups and are linked through the referral link or code given by the person or partner who referred you. See our Vyapar referral code page for how it works.
Related guides
- How to add business details and GSTIN in the Vyapar mobile app
- How to create a GST invoice in the Vyapar mobile app
Useful for these businesses
- Vyapar for medical stores
- Vyapar for building material shops
- Vyapar for electronics shops
- Vyapar for mobile shops
- Vyapar for cosmetics shops
- Vyapar for furniture shops
More on Vyapar
Screenshots are from a demo company in Vyapar Android app 29.4, October 2026. Menus can move slightly between app versions. Guide by Billing Bazaar, a Vyapar partner.